
How to Change Oil ?
How to Change Oil : Your Complete Guide to Changing Car Oil Yourself
Learning how to change car oil yourself is one of the most valuable automotive skills you can master. Not only does a DIY oil change save you money, but it also gives you complete control over your vehicle’s maintenance schedule. In this comprehensive guide, we’ll walk you through the DIY oil change steps and break down the cost of changing your own oil so you can make an informed decision about vehicle maintenance.
Why Change Your Own Motor Oil?
Before diving into the oil change procedure, let’s explore why thousands of car owners are choosing to perform this essential maintenance task themselves.
Financial Savings: The average oil change at a quick-lube shop costs between $35-$75, while premium synthetic oil changes can exceed $100. When you change your own oil, you’ll typically spend $20-$40 on materials, cutting costs by 40-60% per oil change service.
Quality Control: When you perform your own oil change, you choose the exact motor oil brand and oil filter quality. You’re not relying on a technician who might be rushing through multiple vehicles or using lower-grade products.
Learning Curve: Understanding your vehicle’s lubrication system helps you detect potential problems early, like oil leaks, worn drain plugs, or damaged oil pans.
Essential Tools and Materials for an Oil Change
Before starting your DIY oil change, gather these supplies:
Required Tools:
- Socket wrench or adjustable wrench (for drain plug removal)
- Oil filter wrench
- Oil drain pan (minimum 5-quart capacity)
- Funnel
- Jack and jack stands or car ramps
- Work gloves and safety glasses
- Shop rags or paper towels
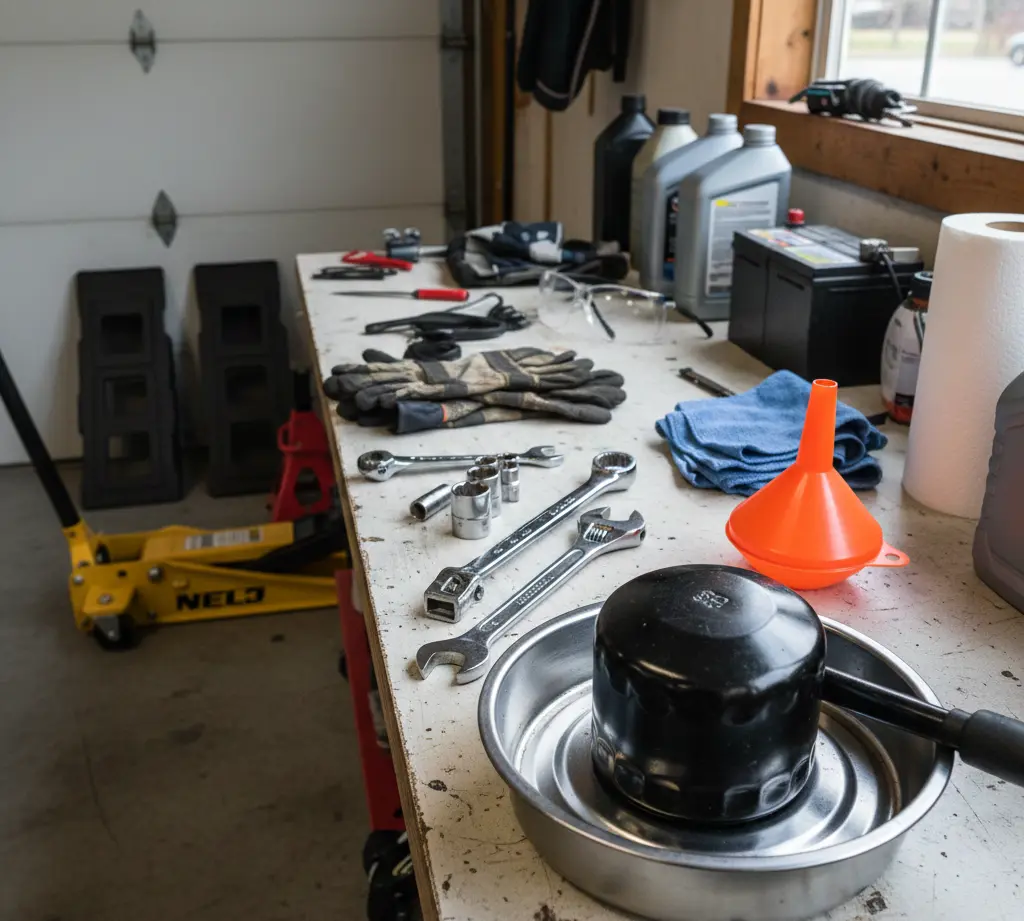
Required Materials:
- New motor oil (check your owner’s manual for the correct viscosity and quantity)
- New oil filter (vehicle-specific)
- New drain plug washer/gasket (recommended)
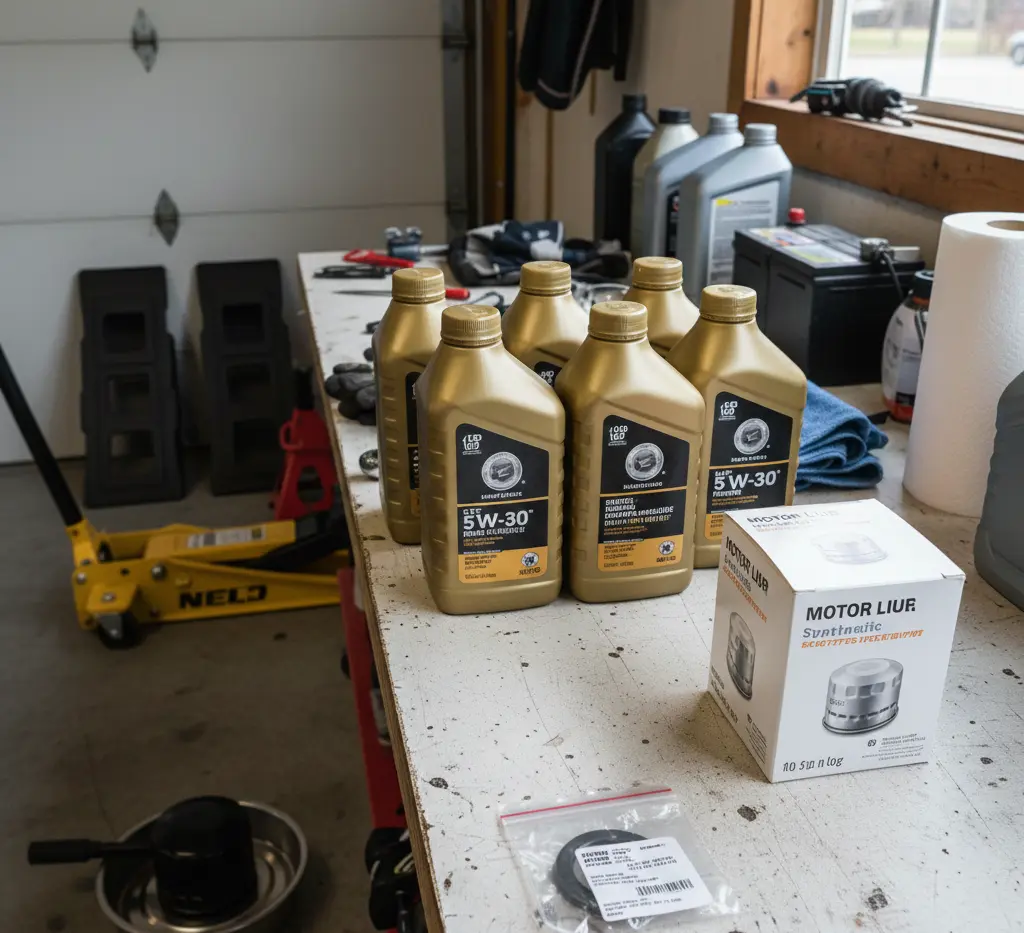
Pro Tip: Your vehicle’s owner’s manual specifies whether you need conventional oil, synthetic blend, or full synthetic motor oil. Using the wrong oil viscosity grade can affect engine performance and longevity.
Step-by-Step DIY Oil Change Guide
Follow these DIY oil change steps carefully to ensure a successful oil change procedure:
Step 1: Prepare Your Vehicle
Warm up your engine for 2-3 minutes. Warm oil flows more freely, ensuring complete drainage from the engine block and oil passages. However, don’t let it get too hot—you don’t want to burn yourself.
Park on a level surface and engage the parking brake. If using a floor jack, position jack stands under the vehicle’s designated lift points for safety. Never work under a vehicle supported only by a jack.

Step 2: Locate the Drain Plug and Oil Filter
Slide under your vehicle and locate the oil drain plug on the bottom of the oil pan. It’s typically a bolt head, often 14mm-17mm in size. Also identify your oil filter—it’s usually a cylindrical canister mounted on the side of the engine.
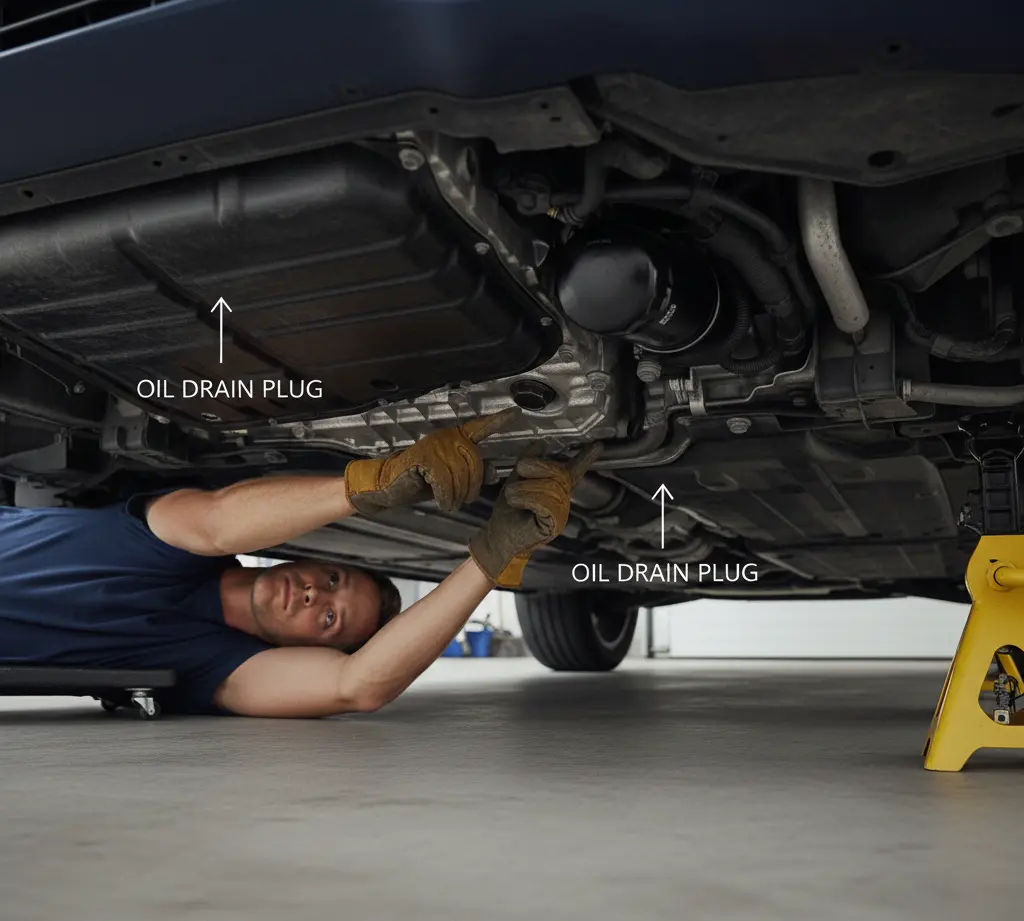
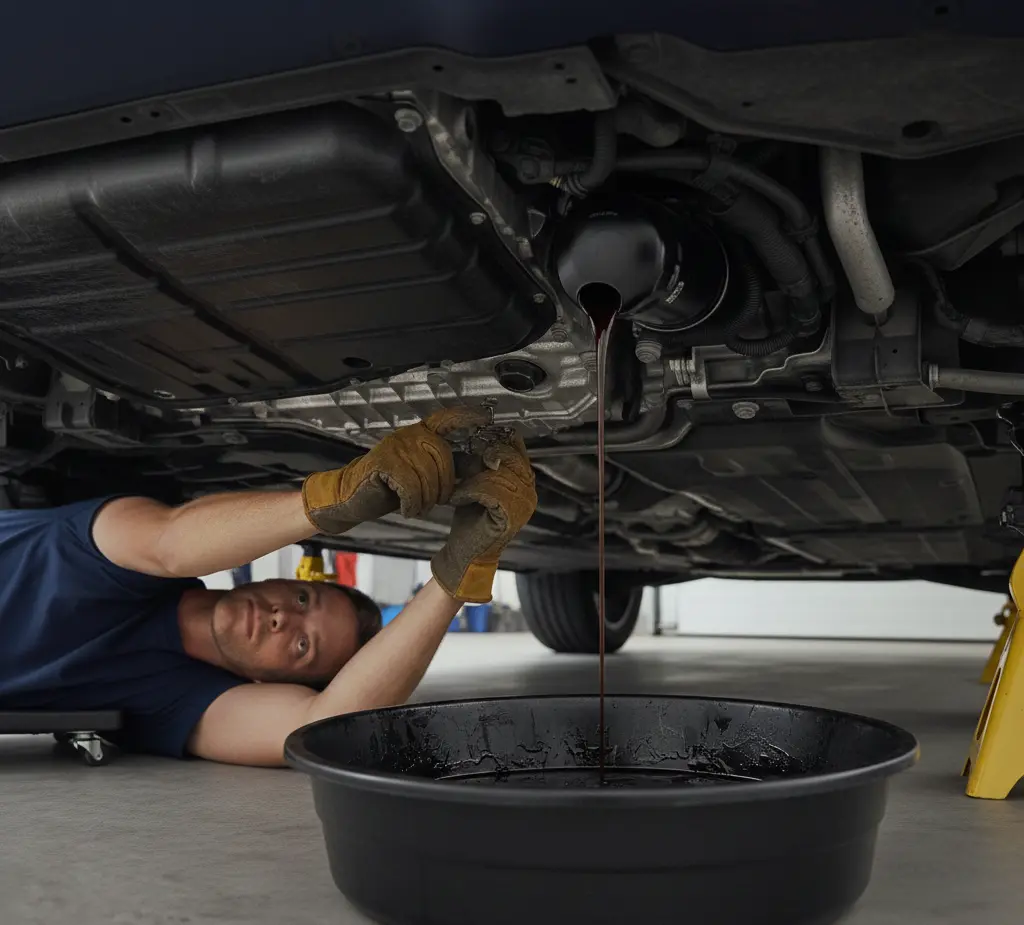
Step 3: Drain the Old Oil
Position your oil drain pan directly beneath the drain plug. Using your socket wrench, slowly loosen the drain plug counterclockwise. Remove it completely by hand for the final turns to avoid dropping it into the drain pan.
Allow 5-10 minutes for complete oil drainage. The used oil will initially gush out, then gradually slow to a trickle. This patience ensures maximum old oil removal from your engine.

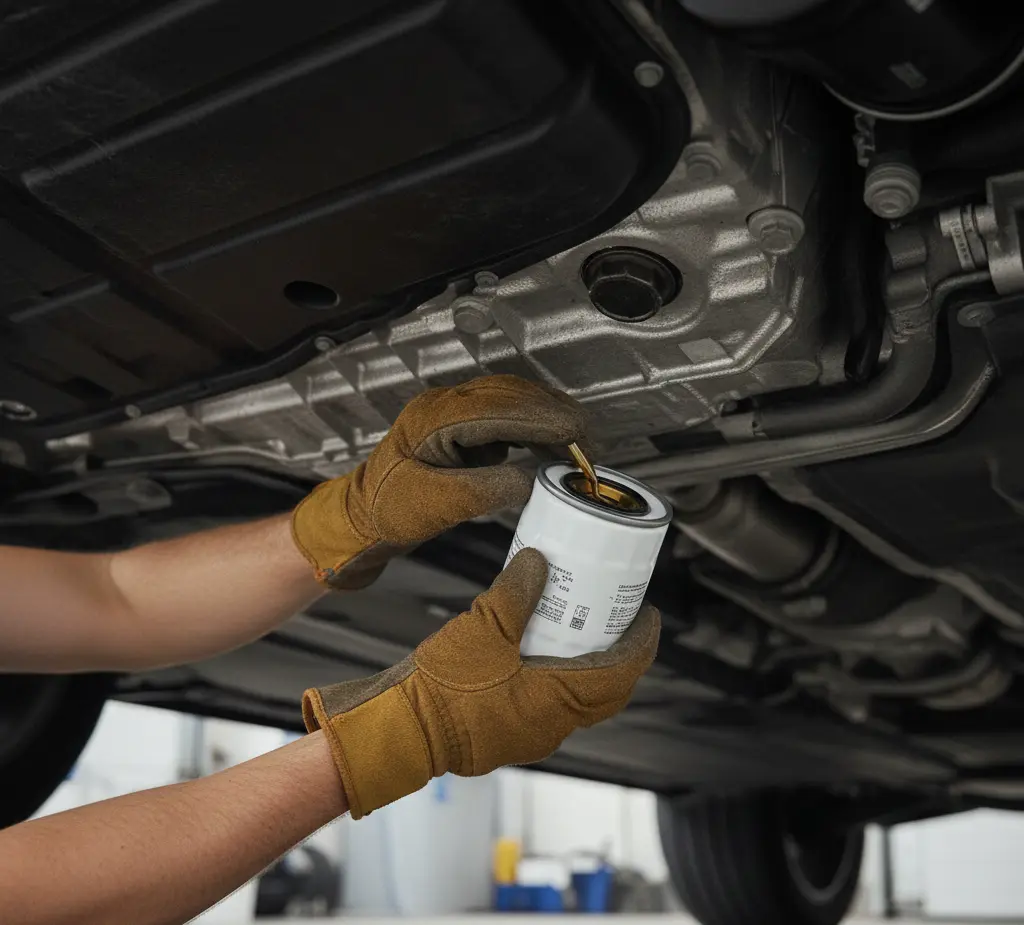
Step 4: Remove the Old Oil Filter
While the oil drains, locate your oil filter. Position your drain pan beneath it—some residual oil will spill when removed. Use an oil filter wrench to turn the filter counterclockwise. Once loose, unscrew it by hand.
Important: Some oil filters are positioned horizontally or upside-down, which can create a mess. Have shop rags ready to catch drips.

Step 5: Install the New Oil Filter
Before installing the new filter, apply a thin coat of fresh motor oil to the rubber gasket on top of the new filter. This ensures proper sealing and makes future removal easier.
Thread the new oil filter onto the mounting base by hand, turning clockwise. Once the gasket contacts the engine block, tighten it an additional three-quarters turn. Don’t over-tighten—hand-tight is sufficient for most filters.
Step 6: Replace the Drain Plug
Once oil drainage is complete, wipe the drain plug and oil pan area clean with a shop rag. Replace the drain plug washer if your vehicle requires one (most modern vehicles do).
Thread the drain plug clockwise by hand first to avoid cross-threading, then tighten with your wrench. Use firm pressure, but don’t over-torque—typical torque specifications range from 20-30 foot-pounds for most vehicles.
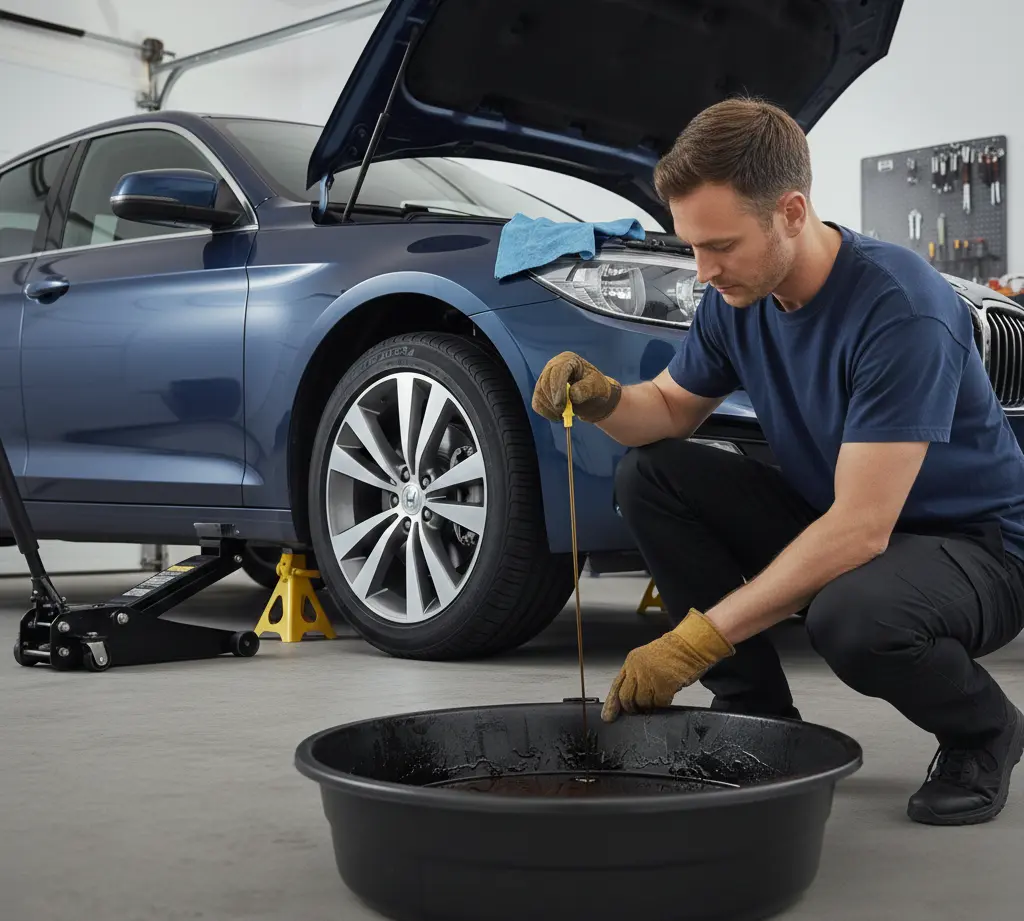
Step 7: Add Fresh Motor Oil
Lower your vehicle from the jack stands and locate the oil filler cap on top of your engine (typically marked with an oil can symbol).
Using a funnel, pour in the recommended amount of fresh motor oil. Most engines require 4-6 quarts, but always check your owner’s manual for the exact capacity. Add oil slowly and check the dipstick frequently as you approach the full mark.

Step 8: Check Oil Level and Test for Leaks
Start your engine and let it run for 30-60 seconds. Watch your oil pressure light—it should turn off within a few seconds, indicating proper oil circulation throughout the engine.
Turn off the engine and wait 2-3 minutes for oil to settle into the oil pan. Check the dipstick—the oil level should be between the minimum and maximum marks. Add more oil if necessary, checking frequently to avoid overfilling.
Slide back under your vehicle and inspect the drain plug and oil filter for leaks. A few drops immediately after an oil change is normal, but active dripping indicates improper installation.
Cost Analysis: Changing Your Own Oil vs. Professional Service
Understanding the cost of changing your own oil helps you see the long-term savings:
Initial Investment: $50-$100 for tools (one-time purchase) Per Oil Change: $20-$40 for oil and filter Annual Savings: $180-$420 (assuming four oil changes per year)
Within just two oil changes, your tool investment pays for itself. Over your vehicle’s lifetime, you could save $2,000-$5,000 compared to professional oil change services.
How Often Should You Change Your Oil?
Modern engines and synthetic oils have extended oil change intervals significantly. Follow these guidelines:
- Conventional Oil: Every 3,000-5,000 miles
- Synthetic Blend: Every 5,000-7,500 miles
- Full Synthetic Oil: Every 7,500-15,000 miles
Always defer to your owner’s manual for manufacturer-specific recommendations. Severe driving conditions (frequent short trips, extreme temperatures, towing) may require more frequent oil changes.
Proper Disposal of Used Motor Oil
Never dump used motor oil down drains or in trash bins—it’s illegal and environmentally harmful. One gallon of used oil can contaminate one million gallons of fresh water.
Take your used oil to:
- Auto parts stores (most accept free returns)
- Municipal recycling centers
- Quick-lube shops
- Household hazardous waste collection sites
Store used oil in sealed containers clearly marked “Used Motor Oil” until you can dispose of it properly.
Common DIY Oil Change Mistakes to Avoid
Over-tightening the drain plug: This strips threads and damages the oil pan, requiring costly repairs.
Using the wrong oil: Incorrect viscosity can cause engine damage. Always match your owner’s manual specifications.
Neglecting the oil filter: Some DIYers change oil without replacing the filter, defeating the purpose of fresh oil.
Skipping the washer replacement: Reusing old drain plug washers often causes leaks.
Final Thoughts on DIY Oil Changes
Learning how to change car oil yourself empowers you to take control of your vehicle maintenance while saving substantial money. The DIY oil change steps outlined above become second nature after your first few attempts, typically taking just 30-45 minutes once you’ve established a routine.
The cost of changing your own oil is significantly lower than professional services, with the added benefit of knowing exactly what products are going into your engine. Whether you’re maintaining an older vehicle or keeping a new car in peak condition, performing your own oil changes is a practical skill that pays dividends for years to come.
Ready to get started? Gather your tools, purchase quality oil and filters, and tackle your first oil change with confidence. Your engine—and your wallet—will thank you.