
The Best Dry Rub Chicken Wings Recipe
Table of Contents
H1: The Only Dry Rub Chicken Wings Recipe You’ll Ever Need for Crispy, Flavorful Wings
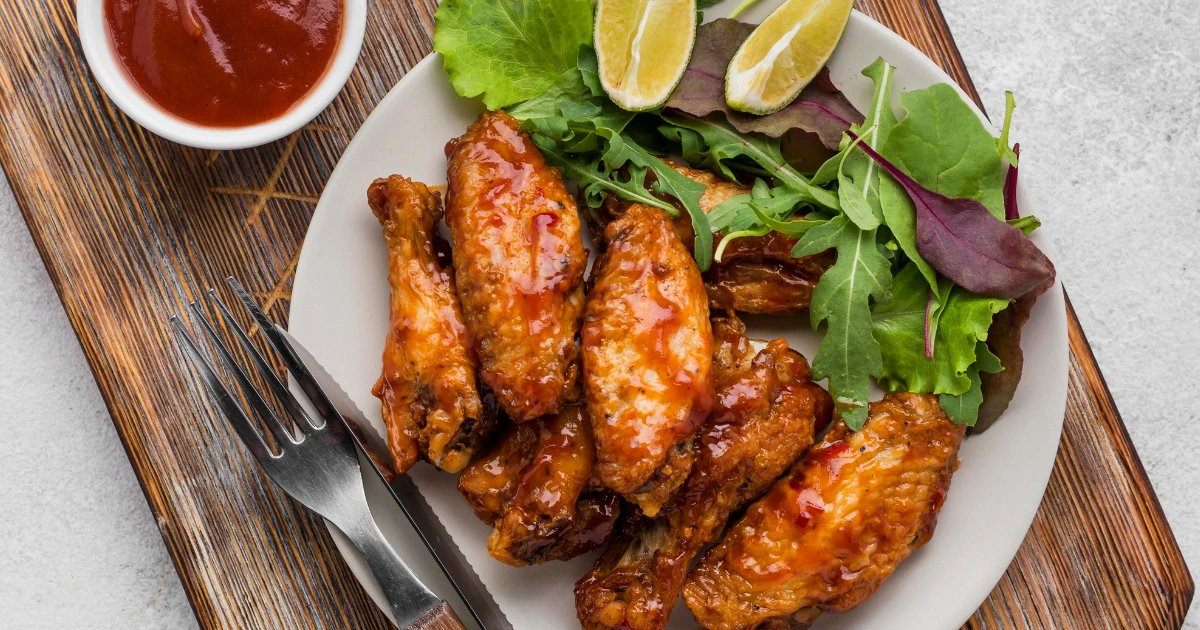
Picture this: a platter of perfectly cooked chicken wings sits at the center of your table. They’re not dripping in sauce or hiding under a layer of glaze. Instead, they have a deep, mahogany-red crust, glistening just so under the light. You pick one up, and the magic happens. The sound of that first bite is a satisfying crackle, giving way to incredibly juicy, tender meat. This is more than just food; it’s the sound of a game night kicking off, the taste of a successful backyard barbecue, and the simple comfort of a movie night done right.
You’ve probably chased that perfect wing experience yourself. Maybe you’ve dealt with soggy skins, bland flavors, or the messy hassle of deep-frying. I’ve been there. The journey to wing perfection can be a long one, but it ends here. This recipe isn’t just a list of ingredients; it’s a method, a collection of secrets that unlocks the door to the crispiest, most flavorful chicken wings you’ve ever made in your own kitchen. It’s time to create those moments of pure culinary triumph, crafting delicious memories one incredible wing at a time.
H2: Why Choose a Dry Rub for Chicken Wings? The Crispy, Flavorful Truth
Before we dive into the recipe, you need to understand why a dry rub is the undisputed champion for achieving wing nirvana. Unlike a wet marinade or a sauce slathered on at the end, a dry rub works its magic from the inside out.
- The Science of Crispiness: The secret to that shatteringly crisp skin lies in one thing: moisture removal. When you coat your wings in a salt-based dry rub, a process called osmosis begins. The salt draws moisture from the chicken skin, allowing it to dry out. When that super-dry skin hits the heat of your oven or air fryer, it renders and crisps up in a way a wet wing simply can’t. You get a fried-like texture without the pot of oil.
- A Deeper Flavor Infusion: A dry rub does more than just sit on the surface. As the spices mingle with the chicken’s natural juices, they create a savory crust that seals in moisture while infusing the meat with a profound and complex flavor. Every bite is seasoned through and through, not just coated in a last-minute sauce.
- Versatility and Less Mess: Let’s be honest, saucy wings are delicious but messy. Dry-rubbed wings give you all the flavor with none of the fuss, making them the perfect choice for any social gathering. They provide a perfect flavor base, ready for dipping into your favorite sauces or simply enjoying in their unadulterated, crispy glory.
H2: Crafting the Ultimate Homemade Dry Rub: Your Spice Drawer’s Superstars
The heart and soul of this recipe is the rub itself. This isn’t just a random assortment of spices; it’s a balanced blend designed to hit all the right notes—smoky, sweet, savory, and with just a hint of heat. You have complete control, and your reward is a flavor that no store-bought seasoning can replicate.
H3: The Perfect Spice Blend for The Best Dry Rub Chicken Wings
Here is the exact combination you’ll need to create that magical crust. The secret weapon here is the baking powder—don’t skip it! It raises the pH of the chicken skin, which helps it brown faster and get even crispier.
| Ingredient | Amount | Notes |
| Smoked Paprika | 2 Tablespoons | Provides a deep, smoky flavor and rich color. |
| Light Brown Sugar | 1.5 Tablespoons | For a touch of caramelization and sweetness to balance the spice. |
| Garlic Powder | 1 Tablespoon | A savory essential for that aromatic foundation. |
| Onion Powder | 1 Tablespoon | Adds a layer of savory depth. |
| Chili Powder | 2 Teaspoons | Offers a mild heat and earthy flavor. |
| Coarse Sea Salt | 1.5 Teaspoons | Crucial for flavor and helping to dry out the skin. |
| Freshly Ground Black Pepper | 1.5 Teaspoons | For a pungent, spicy kick. |
| Cumin | 1 Teaspoon | Adds a warm, earthy note. |
| Cayenne Pepper | ½ Teaspoon | Optional, but recommended for a touch of heat. |
| Baking Powder | 1 Teaspoon | The secret ingredient for extra-crispy skin! |
H3: Step-by-Step Guide to Prepping Your Wings for Perfection
Your technique here is just as important as the ingredients. Follow these steps closely for guaranteed success.
- Pat the Wings Dry: Start with about 3 pounds of chicken wings. Using paper towels, pat each wing completely dry. You want to remove as much surface moisture as possible. This is the single most critical step for getting crispy skin, so don’t be shy.
- Combine the Rub: Grab a small bowl and whisk together all of your dry rub ingredients—from the smoked paprika to that all-important baking powder. Mix until the color is uniform and everything is evenly distributed.
- Coat Generously: Place your super-dry wings in a large bowl or a sealable plastic bag. Sprinkle the entire batch of the dry rub mixture over the wings.
- Toss to Coat: Seal the bag (while removing most of the air) or cover your bowl. Now, shake and toss the wings vigorously. You want to ensure every nook and cranny of each wing is generously coated in the spice blend.
- The “Dry Brine” Rest: This step is optional but highly recommended for the best possible flavor and texture. Arrange the coated wings in a single layer on a wire rack set over a baking sheet. Place them in the refrigerator, uncovered, for at least 4 hours, or ideally overnight. This allows the rub to act as a dry brine, seasoning the meat deeply while the circulating air in the fridge dries the skin out even more.
H2: Cooking Methods: Your Guide to the Crispiest Chicken Wings
You have two excellent, straightforward paths to wing perfection. Both the oven and the air fryer will yield phenomenal results with this recipe.
H3: The Oven-Baked Method for Flawless Results
- Oven Setup: Preheat your oven to a hot 425°F (220°C). Make sure your wings are still arranged in a single layer on that wire rack over a baking sheet. This setup is crucial because it allows hot air to circulate around the entire wing, crisping it from all angles.
- Baking Time: Bake for 45-55 minutes. You’ll need to flip the wings halfway through the cooking time to ensure they cook and crisp evenly.
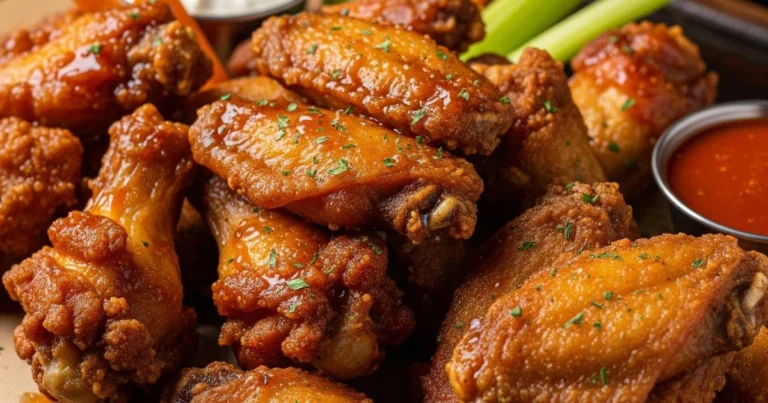
- The Final Crisp: You’ll know they’re done when they have a deep golden-brown color and the skin is visibly tight and crispy. Listen for the sizzle—it’s the sound of success.
H3: The Air Fryer Method for Quick and Extra-Crispy Wings
- Preheat: Get your air fryer preheating to 400°F (200°C).
- Arrange in a Single Layer: Place the seasoned wings in the air fryer basket. The key here is to make sure they are in a single layer and not overlapping. If you overcrowd the basket, the wings will steam instead of crisping. Cook in batches if you have to.
- Cooking Time: Air fry for about 20-25 minutes. Give the basket a good shake or flip the wings with tongs about halfway through the cooking time to promote even browning. They’re ready when they are golden and deliciously crispy.
H2: Pro Tips from a Seasoned Wing Enthusiast
- Don’t Skip the Baking Powder: It’s worth repeating. This is not baking soda. Baking powder is a game-changer that helps break down proteins in the skin and encourages browning, giving you that perfect crunch.
- Give Them Space: Whether you’re using an oven or an air fryer, space is your friend. Crowding your wings traps steam, which is the mortal enemy of crispiness. Give each wing a little breathing room.
- Rest Before Serving: As tempting as it is to dive right in, let the wings rest for about 5 minutes after they come out of the heat. This allows the juices to redistribute throughout the meat, ensuring every bite is as tender and flavorful as possible.
H2: Perfect Pairings: Dipping Sauces and Sides
While these wings are incredible on their own, the right accompaniments can take them to the next level.
- Classic Dipping Sauces:
- Homemade Creamy Blue Cheese Dip
- Zesty Buttermilk Ranch Dressing
- Spicy BBQ Sauce for a touch of smoky sweetness
- Complementary Side Dishes:
- Crisp Celery and Carrot Sticks for a cool crunch
- Creamy Coleslaw to balance the savory spices
- Thick-cut Potato Wedges for a hearty meal
Conclusion: Your New Go-To Wing Recipe Awaits
You are now officially equipped with the knowledge and the method to create the most incredible dry rub chicken wings. This is more than a recipe—it’s your new game plan for achieving wing perfection every single time. By understanding the simple science behind each step, from drying the wings to the power of the right spice blend, you’ve unlocked the secret to a dish that will have everyone asking for your secret. So go ahead, get those spices mixed, and prepare to be crowned the undisputed “Wing Master.”
Have you tried this recipe? Do you have your own secret ingredient? Share your results and tips in the comments below!
FAQ: Answering Your Questions About The Best Dry Rub Chicken Wings Recipe
H4: Can I make the dry rub for this chicken wings recipe ahead of time?
Absolutely! You can prepare a large batch of this dry rub and store it in an airtight container in a cool, dark place for up to six months. Having it ready to go makes this an incredibly quick and easy meal to prepare on a busy weeknight.
H4: What’s the best way to get crispy skin when making The Best Dry Rub Chicken Wings Recipe?
The two non-negotiable steps are to pat the wings completely dry with a paper towel before seasoning and to include that teaspoon of baking powder in your rub. Additionally, cooking them on a wire rack in the oven or in a single layer in the air fryer is essential for achieving that perfect all-over crispiness.
H4: Can I use frozen chicken wings for this recipe?
For the best possible results, you should use fresh or fully thawed chicken wings. It is impossible to get the skin properly dry if the wings are frozen, which is the most crucial step for getting that signature crispy skin that defines the best dry rub chicken wings recipe.
One Comment
Comments are closed.