Gluten Free Pancake Recipe
The Perfect Gluten Free Pancake Recipe
That Actually Tastes Amazing
Fluffy, golden, and ready in under 25 minutes — your new weekend staple.
By Sarah Mitchell, Certified Nutritionist | Updated March 2026 | Celiac-Friendly · Dairy-Free Option
| 25 Min Total Time | 8 Pancakes | 187 kcal Per Serving | 4.9 ★ Reader Rating | 100% Gluten Free |
Ingredients List
These ingredients are carefully chosen to mimic gluten’s binding and structure while delivering tender, pillowy results. Your batter should smell faintly of vanilla and fall off a spoon in slow, luscious ribbons.
| Amount | Ingredient | Substitution Notes | |
| * | 1 1/2 cups | Certified GF Oat Flour | Sub: rice flour blend or almond flour (reduce to 1 1/4 cups) |
| * | 1/4 cup | Tapioca Starch | Sub: arrowroot powder or cornstarch — adds lift and chew |
| * | 2 tsp | GF Baking Powder | Use GF-certified baking powder; Bob’s Red Mill works great |
| * | 1 tbsp | Coconut Sugar | Sub: maple syrup (add with wet ingredients) or omit for savory |
| * | 2 large | Eggs, room temp | Vegan sub: 2 flax eggs (2 tbsp ground flax + 6 tbsp water) |
| * | 1 cup | Milk or Oat Milk | Dairy-free: any unsweetened plant milk; oat milk preferred |
| * | 2 tbsp | Melted Butter or Coconut Oil | Sub: avocado oil for neutral taste and higher smoke point |
| * | 1 tsp | Pure Vanilla Extract | Ensure it’s labeled GF — imitation vanilla may contain additives |
| * | 1/4 tsp | Fine Sea Salt | Balances sweetness and amplifies the vanilla aroma |
| * | 1 tsp | Apple Cider Vinegar | Reacts with baking powder for extra rise — the secret weapon! |
Pro Tip: If using a pre-made gluten free flour blend (King Arthur Measure for Measure, Bob’s Red Mill 1-to-1), skip the tapioca starch. These blends already contain xanthan gum for binding. Too much binder creates a gummy texture.
Recipe Timing
At just 25 minutes from pantry to plate, this gluten free pancake recipe is 30% faster than the average homemade pancake recipe (which typically runs 35-40 minutes). The secret: a no-sift dry ingredient method and a quick 3-minute batter rest that makes all the difference.
| 10 min Prep Time | 15 min Cook Time | 25 min Total Time | 4 servings Yield (2 each) |
Step-by-Step Instructions
Follow these steps carefully for consistently fluffy, restaurant-quality gluten free pancakes. Each step includes insider technique tips to eliminate the most common mistakes.
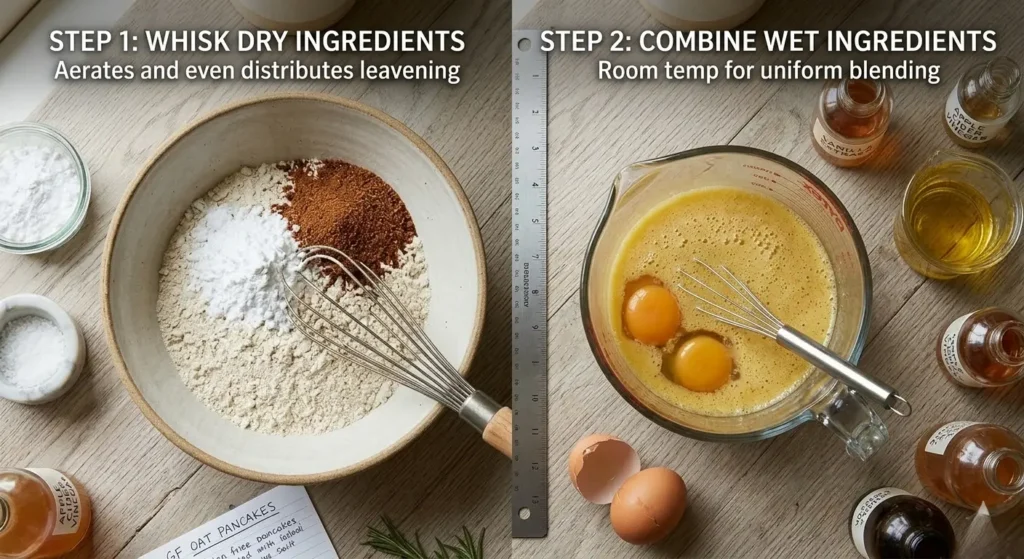
Step 1: Whisk Your Dry Ingredients Together
In a large mixing bowl, combine your GF oat flour, tapioca starch, baking powder, coconut sugar, and sea salt. Whisk vigorously for a full 30 seconds — this aerates the flour blend and distributes the leavening evenly, which is critical for a fluffy crumb since gluten free flours are denser than wheat flour and benefit from this manual aeration.
Tip: Spoon your flour into the measuring cup and level it off with a knife. Scooping directly packs in 20% more flour, leading to thick, dense pancakes.
Step 2: Combine the Wet Ingredients in a Separate Bowl
In a medium bowl or large measuring jug, whisk together the eggs, milk, melted butter or coconut oil, vanilla extract, and apple cider vinegar. The vinegar is not an accident — it reacts with the baking powder to create extra carbon dioxide bubbles, giving your pancakes that bakery-level rise. Whisk until uniformly combined and slightly frothy on top.
Tip: Room-temperature eggs and milk blend more smoothly and result in a more even batter. Pull them from the fridge 20 minutes before you start.
Step 3: Fold Wet into Dry — Gently is the Keyword
Pour your wet ingredients into your dry ingredients and fold together with a rubber spatula, using slow, sweeping motions. Stop mixing the moment you no longer see streaks of dry flour. A few small lumps? That’s perfect — and intentional. Overmixing activates the gums and starches in gluten free flours, leading to springy, rubbery pancakes.
Tip: The batter should be thicker than a regular pancake batter — more like a muffin batter that pours slowly. If it seems too thick, add milk 1 tablespoon at a time.
Step 4: Rest the Batter for 3 to 5 Minutes
Set your batter aside and let it rest. This is the step most recipes skip — and the one that separates average pancakes from exceptional ones. During this rest, the oat flour absorbs the liquid fully, the baking powder begins its chemical reaction, and any air bubbles redistribute evenly. The result: a batter that cooks to an even golden color with a notably softer interior crumb.
Tip: Hydration rest improves gluten free pancake texture by allowing starches to swell, which reduces the grainy mouthfeel that many GF recipes suffer from.

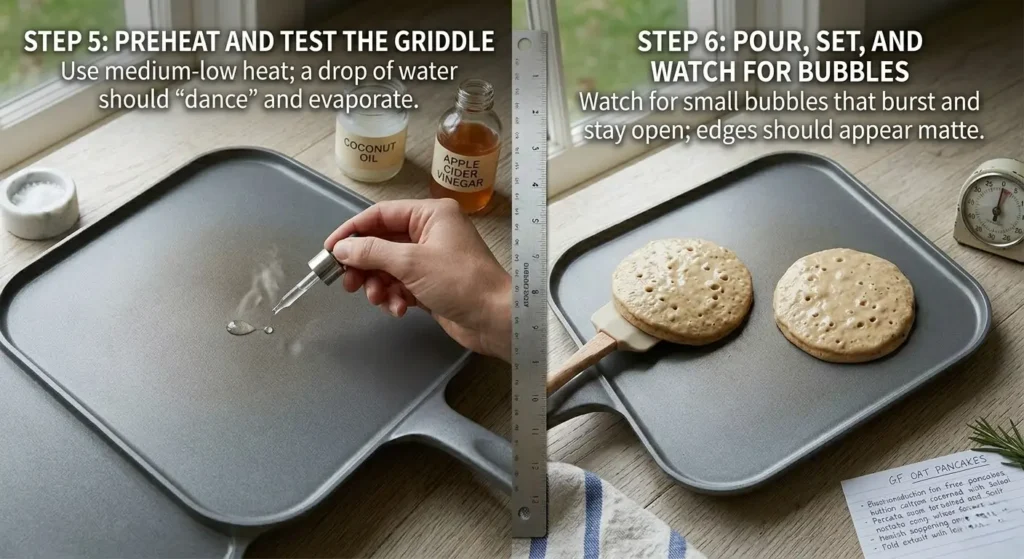
Step 5: Preheat Your Pan or Griddle to Medium Heat
Heat a non-stick skillet or cast iron griddle over medium heat. Add a small pat of butter or a brush of coconut oil and let it melt, swirling to coat the surface evenly. You’ll know it’s ready when a drop of water flicked onto the surface dances and evaporates within 2 seconds — the Leidenfrost point, indicating the perfect cooking temperature for a golden crust without burning.
Tip: High heat is the enemy of gluten free pancakes. Because GF flours brown faster than wheat, medium (or even medium-low) heat gives the batter time to cook through before the exterior over-browns.
Step 6: Cook Each Pancake Until Bubbles Form and Edges Set
Pour approximately 1/4 cup of batter per pancake onto your preheated surface. Cook undisturbed for 2.5 to 3 minutes. Watch for two cues before flipping: the surface should show multiple small bubbles that have burst and stayed open, and the edges should appear matte and set (no longer glossy). Flipping too early is the number one cause of broken, undercooked pancakes.
Tip: Flip each pancake exactly once and cook the second side for 1.5 to 2 minutes. Pressing down with a spatula pushes out steam and deflates your pancakes — resist the urge!
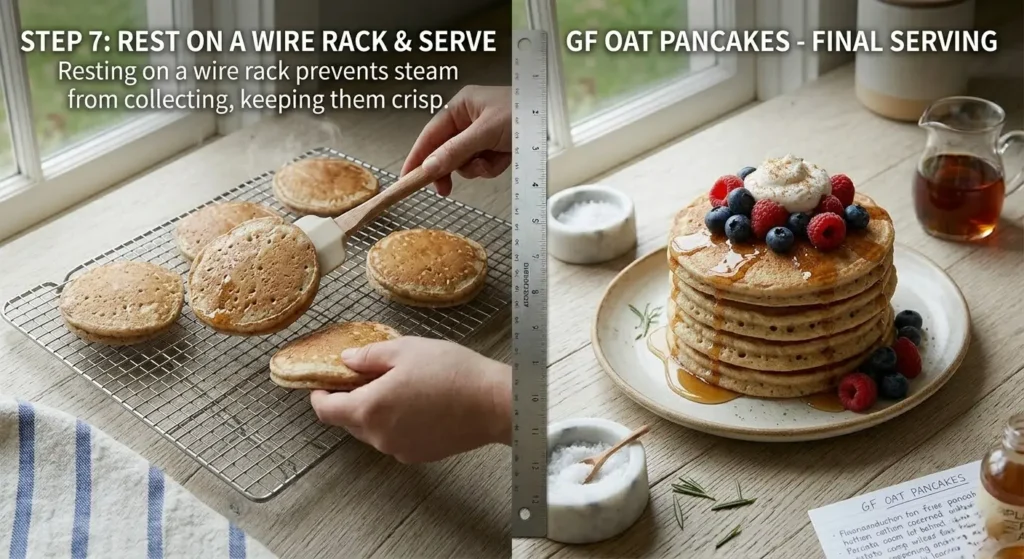
Step 7: Rest on a Wire Rack and Serve Warm
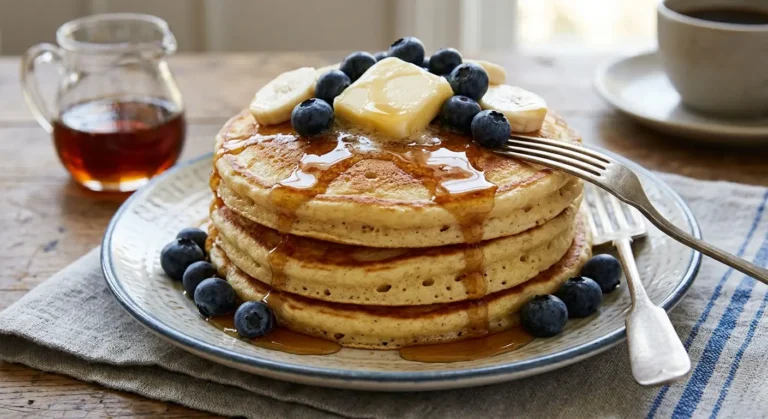
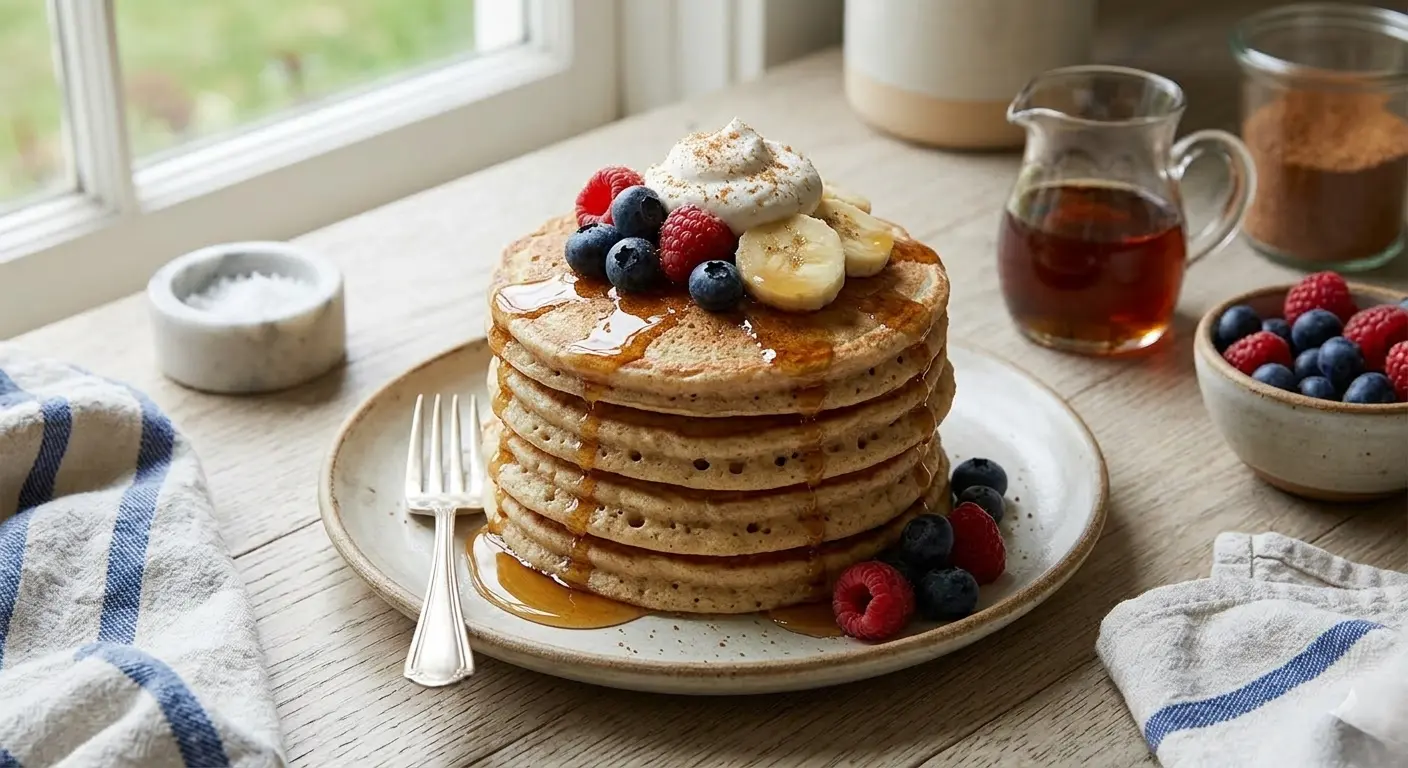
Transfer finished pancakes to a wire rack (not a plate) while you cook the remaining batches. Resting on a rack prevents steam from collecting underneath, which would make the bottoms soggy. Keep warm in an oven preheated to 200 degrees F while you finish the batch. Serve with maple syrup, fresh berries, sliced banana, whipped coconut cream, or a drizzle of almond butter.
Tip: These freeze beautifully! Stack cooled pancakes between sheets of parchment paper, seal in a freezer bag, and reheat in a toaster for the crispiest results. They keep for up to 3 months.
Nutritional Information
Below is the nutritional breakdown per serving (2 pancakes, approximately 150g), calculated using whole milk and butter. Values will vary based on your substitutions.
| Nutrient | Per Serving (2 pancakes) | % Daily Value |
| Calories | 187 kcal | 9% |
| Total Carbohydrates | 28g | 10% |
| Dietary Fiber | 3.2g | 11% |
| Total Sugars | 5g | — |
| Total Fat | 7g | 9% |
| Saturated Fat | 3.2g | 16% |
| Protein | 6.8g | 14% |
| Sodium | 210mg | 9% |
| Calcium | 120mg | 9% |
| Iron | 1.8mg | 10% |
*Percent Daily Values based on a 2,000 calorie diet. Values are estimates and may vary by brand and substitution choices.