How to Cook Ribs in the Oven
How to Cook Ribs in the Oven: The Ultimate Fall-Off-the-Bone Guide
Ingredients You’ll Need
These are pantry-friendly ingredients that deliver maximum flavor. Feel free to swap where noted — flexibility is part of great cooking.
For the Ribs:
- 1 full rack of baby back pork ribs (approximately 2.5 to 3 lbs) — or substitute with St. Louis-style spare ribs for a meatier, fattier bite
- 2 tablespoons olive oil (or avocado oil for a higher smoke point)
- Salt and black pepper to taste
For the Dry Rub (the flavor backbone):
- 2 tablespoons brown sugar (packed) — sub: coconut sugar for a less refined option
- 1 tablespoon smoked paprika — sub: regular paprika + ¼ tsp liquid smoke for similar depth
- 1 tablespoon garlic powder
- 1 teaspoon onion powder
- 1 teaspoon ground cumin
- 1 teaspoon chili powder
- ½ teaspoon cayenne pepper (reduce to ¼ tsp for mild heat)
- 1 teaspoon dried oregano
- 1 teaspoon mustard powder
For the BBQ Glaze (optional but highly recommended):
- 1 cup of your favorite BBQ sauce — homemade or store-bought (we love a Kansas City-style for its sweet, tangy notes)
- 1 tablespoon apple cider vinegar
- 1 tablespoon honey
For Braising (the secret weapon for ultra-tender ribs):
- ½ cup apple juice or apple cider (sub: chicken broth for a savory profile)
- 1 tablespoon Worcestershire sauce
💡 Pro Tip: Buy ribs with good marbling — visible fat streaks between the meat — as this is your insurance policy against dry, bland ribs. Ask your butcher to remove the membrane if you prefer convenience.
Step-by-Step Instructions: How to Cook Ribs in the Oven
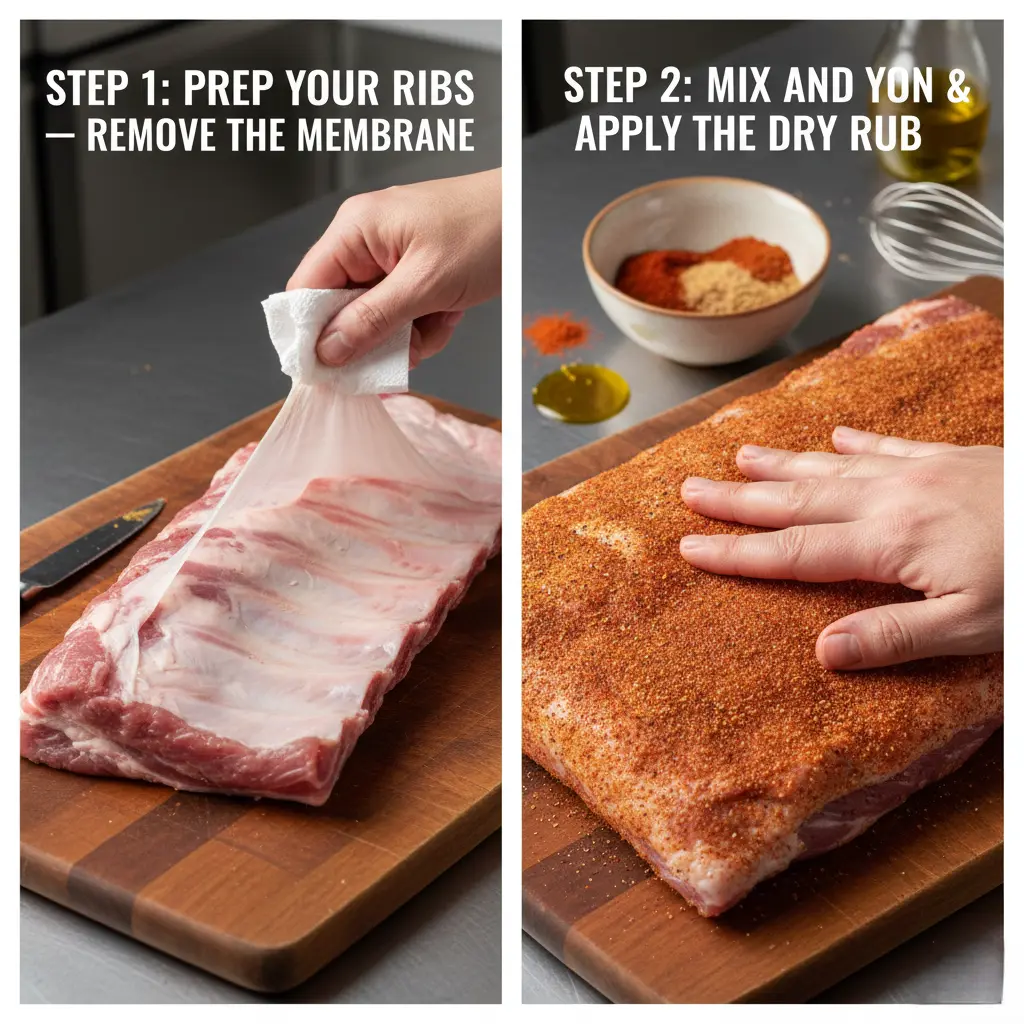
Step 1: Prep Your Ribs — Remove the Membrane
This is the single most important step that most beginner rib cooks skip, and it makes a world of difference. Flip your rack meat-side down. You’ll see a shiny, paper-like membrane (called the pleura) stretched across the bones. Using a butter knife, loosen one edge of the membrane at the corner of the rack. Then grab it firmly with a paper towel (for grip) and pull it off in one smooth motion.
Removing the membrane allows the dry rub to penetrate both sides of the meat and lets heat circulate evenly, preventing a rubbery texture on the underside. Don’t skip this step.
💡 Pro Tip: If the membrane is stubborn, score it lightly with a knife before pulling. This takes 60 seconds and adds hours of flavor impact.
Step 2: Mix and Apply the Dry Rub
In a small mixing bowl, combine all your dry rub ingredients: brown sugar, smoked paprika, garlic powder, onion powder, cumin, chili powder, cayenne, dried oregano, and mustard powder. Whisk together until fully blended.
Pat your ribs dry with paper towels — moisture is the enemy of a great bark. Drizzle olive oil over both sides and rub it in. Then season generously with salt and black pepper. Finally, apply your dry rub mixture evenly across all surfaces, pressing it firmly into the meat so it adheres well. Don’t be shy — a thick, even coat is what creates that beautiful, deeply flavored crust.
Wrap the seasoned ribs in plastic wrap or place them in a large zip-lock bag and refrigerate for at least 2 hours, or ideally overnight. This resting period allows the salt to draw out moisture and then reabsorb it, carrying the spices deep into the meat fibers — a process called dry brining.
💡 Pro Tip: Make a double batch of the dry rub and keep it in an airtight jar. It’s also fantastic on chicken thighs, pulled pork, and brisket.
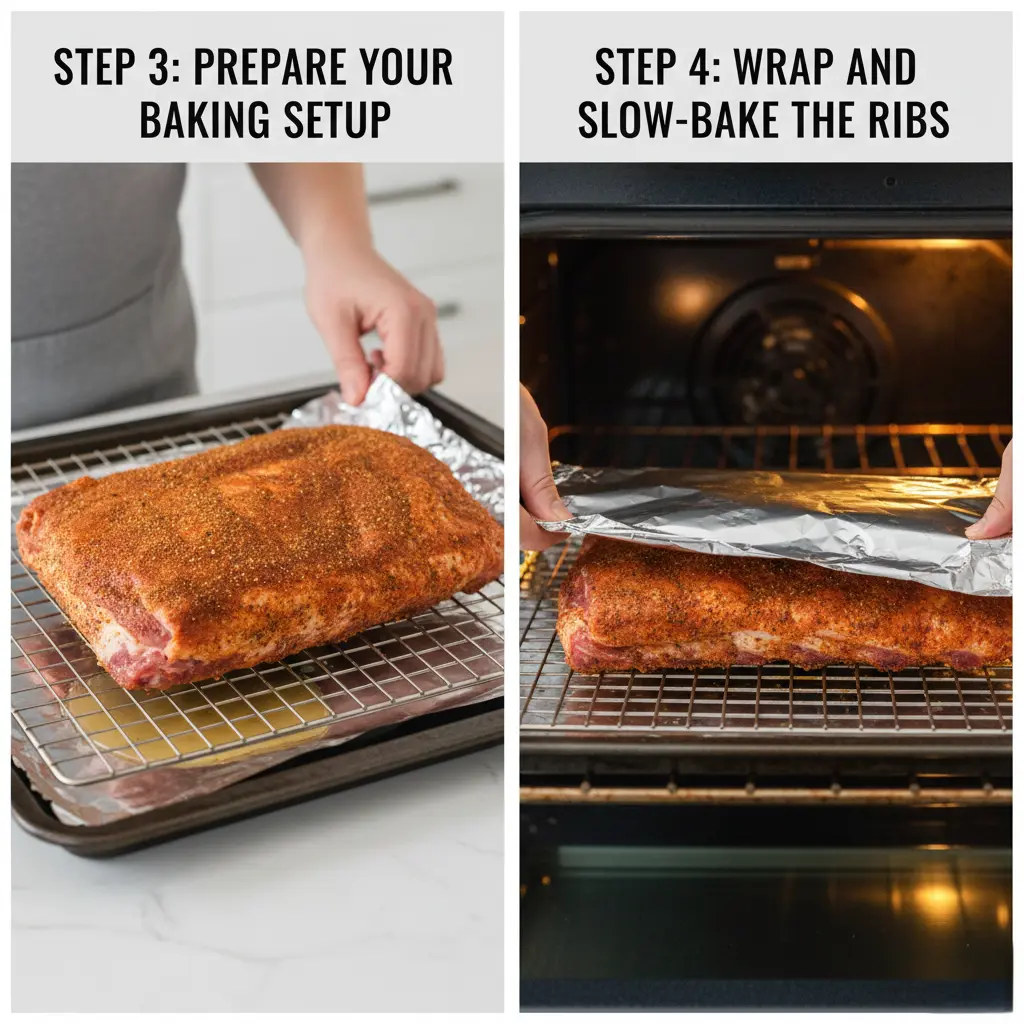
Step 3: Prepare Your Baking Setup
Preheat your oven to 275°F (135°C). This low temperature is critical for achieving tender, slow-cooked rib perfection. While the oven heats, line a large rimmed baking sheet with aluminum foil — two layers for easy cleanup. Place a wire rack over the baking sheet if you have one (this elevates the ribs and promotes even heat circulation on all sides).
If you don’t have a wire rack, that’s perfectly fine. Place the ribs directly on the foil, meat-side up. Pour your braising liquid — apple juice and Worcestershire sauce — into the bottom of the baking pan. This creates a moist steam environment inside the foil tent, preventing the ribs from drying out during the long cook.
Step 4: Wrap and Slow-Bake the Ribs
Place your seasoned rack of ribs meat-side up on the prepared baking sheet. Tent the ribs tightly with a second large sheet of aluminum foil, crimping the edges firmly to seal in all the steam. This foil tent is your oven’s version of a smoker’s water pan — it keeps the internal environment humid, which is essential for breaking down tough connective tissue.
Slide the wrapped ribs into your preheated oven and bake for 2.5 to 3 hours. For baby back ribs, start checking at the 2.5-hour mark. For larger spare ribs, go the full 3 hours. You’ll know the ribs are ready when the meat has pulled back from the ends of the bones by at least ¼ inch and the rack begins to flex and crack slightly when you lift one end.
💡 Pro Tip: For an extra layer of flavor, add 2-3 wood chips wrapped in foil with small holes to the baking pan. It mimics a smoky environment and gives your oven ribs incredible depth.
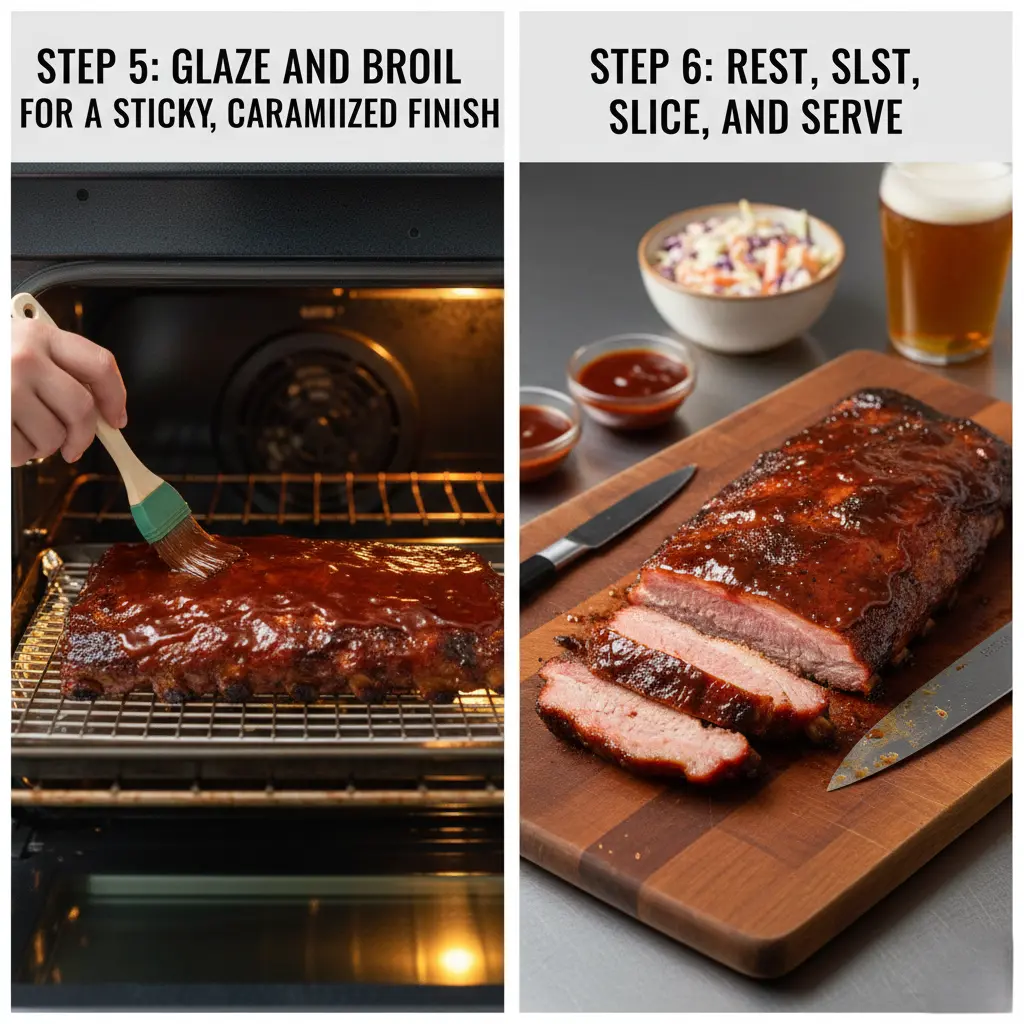
Step 5: Glaze and Broil for a Sticky, Caramelized Finish
While the ribs finish baking, whisk together your BBQ glaze: BBQ sauce, apple cider vinegar, and honey in a small saucepan over medium heat. Simmer for 3-4 minutes until slightly thickened. This builds complexity and makes the glaze cling beautifully to the meat.
Once the ribs are done slow-baking, carefully remove the foil tent. Drain any accumulated liquid from the pan (you can save this for a delicious sauce or discard it). Brush a generous layer of your BBQ glaze over the top surface of the ribs. Switch your oven to the broiler setting on high and place the ribs under the broiler for 4-6 minutes, watching carefully to prevent burning. You want a gorgeous, bubbly, lacquered surface with slight char marks at the tips of the bones.
Remove from the broiler, brush with a second coat of glaze, and broil for another 2-3 minutes. That double-glaze technique gives you layers of sticky, caramelized flavor that rivals anything from a professional BBQ joint.
💡 Pro Tip: Stay near the oven during broiling — glazes can go from beautifully caramelized to burnt in under a minute. Set a timer and check every 2 minutes.
Step 6: Rest, Slice, and Serve
This step is non-negotiable: let your ribs rest for at least 10 minutes before slicing. Cutting into them immediately causes all those gorgeous, hard-earned juices to run out onto the cutting board instead of staying in the meat where they belong. Tent loosely with foil while they rest to retain warmth.
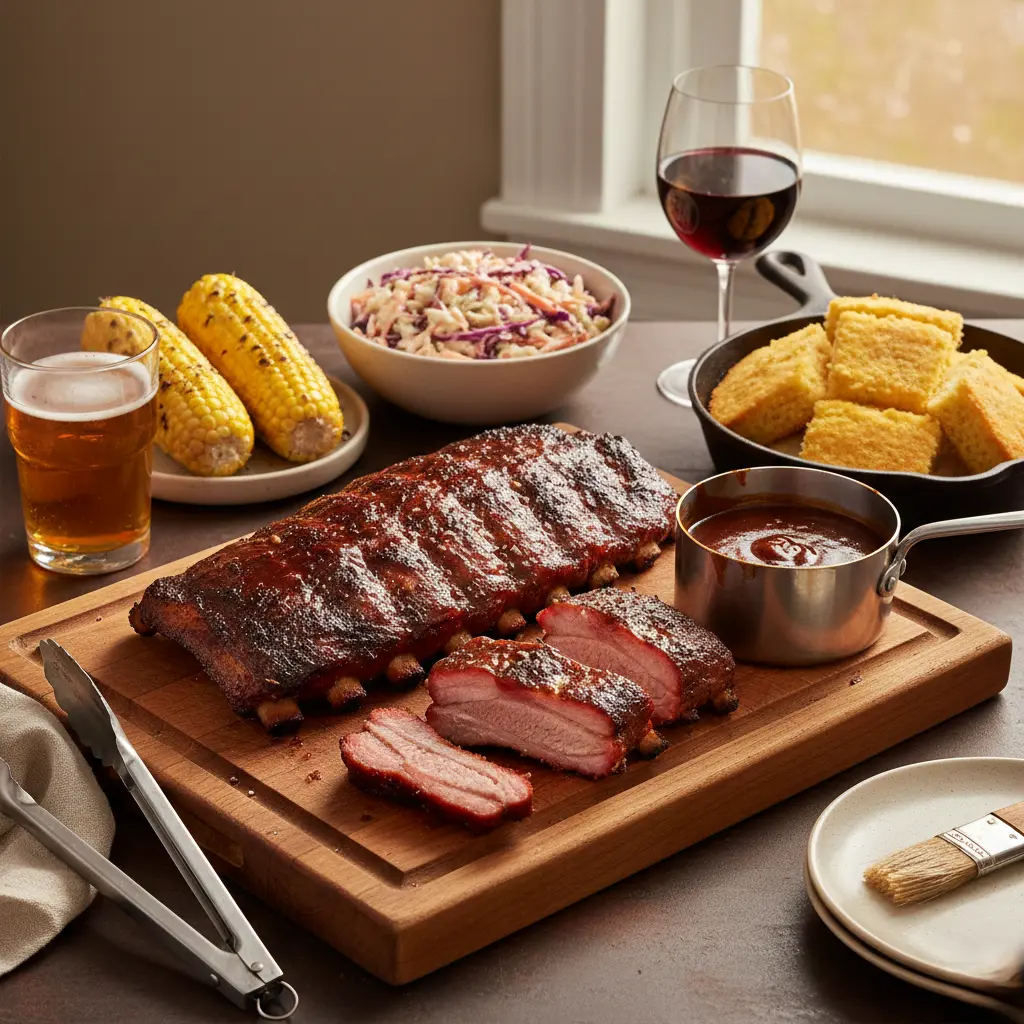
To slice, flip the rack bone-side up. Using a sharp chef’s knife or boning knife, cut straight down between each bone to portion individual ribs. Serve with extra BBQ sauce on the side, classic coleslaw, cornbread, or roasted corn on the cob. These oven-baked ribs pair beautifully with a cold craft beer or a bold, fruity red wine like a Zinfandel.
Nutritional Information
The following values are estimated per serving of approximately 3 ribs (based on a rack yielding 12 ribs, serving 4 people). Values may vary depending on the specific BBQ sauce used and rib size.
| Nutrient | Per Serving (3 ribs) | % Daily Value |
| Calories | 490 kcal | 25% |
| Protein | 38g | 76% |
| Total Fat | 34g | 44% |
| Saturated Fat | 12g | 60% |
| Carbohydrates | 14g | 5% |
| Sugars | 11g | — |
| Sodium | 720mg | 31% |
| Iron | 2.8mg | 16% |
| Zinc | 5.6mg | 51% |
Ribs are a protein-dense, satisfying meal. Pork ribs are an excellent source of zinc, which supports immune function, and B vitamins including B12, which is critical for nerve health and energy metabolism. The fat content, while higher than lean cuts, is largely monounsaturated when derived from quality pork — similar in profile to olive oil.
For a lighter version, choose baby back ribs over spare ribs (they have slightly less fat), use a sugar-free BBQ sauce to reduce carbohydrate content, and trim any visible excess fat before cooking.